
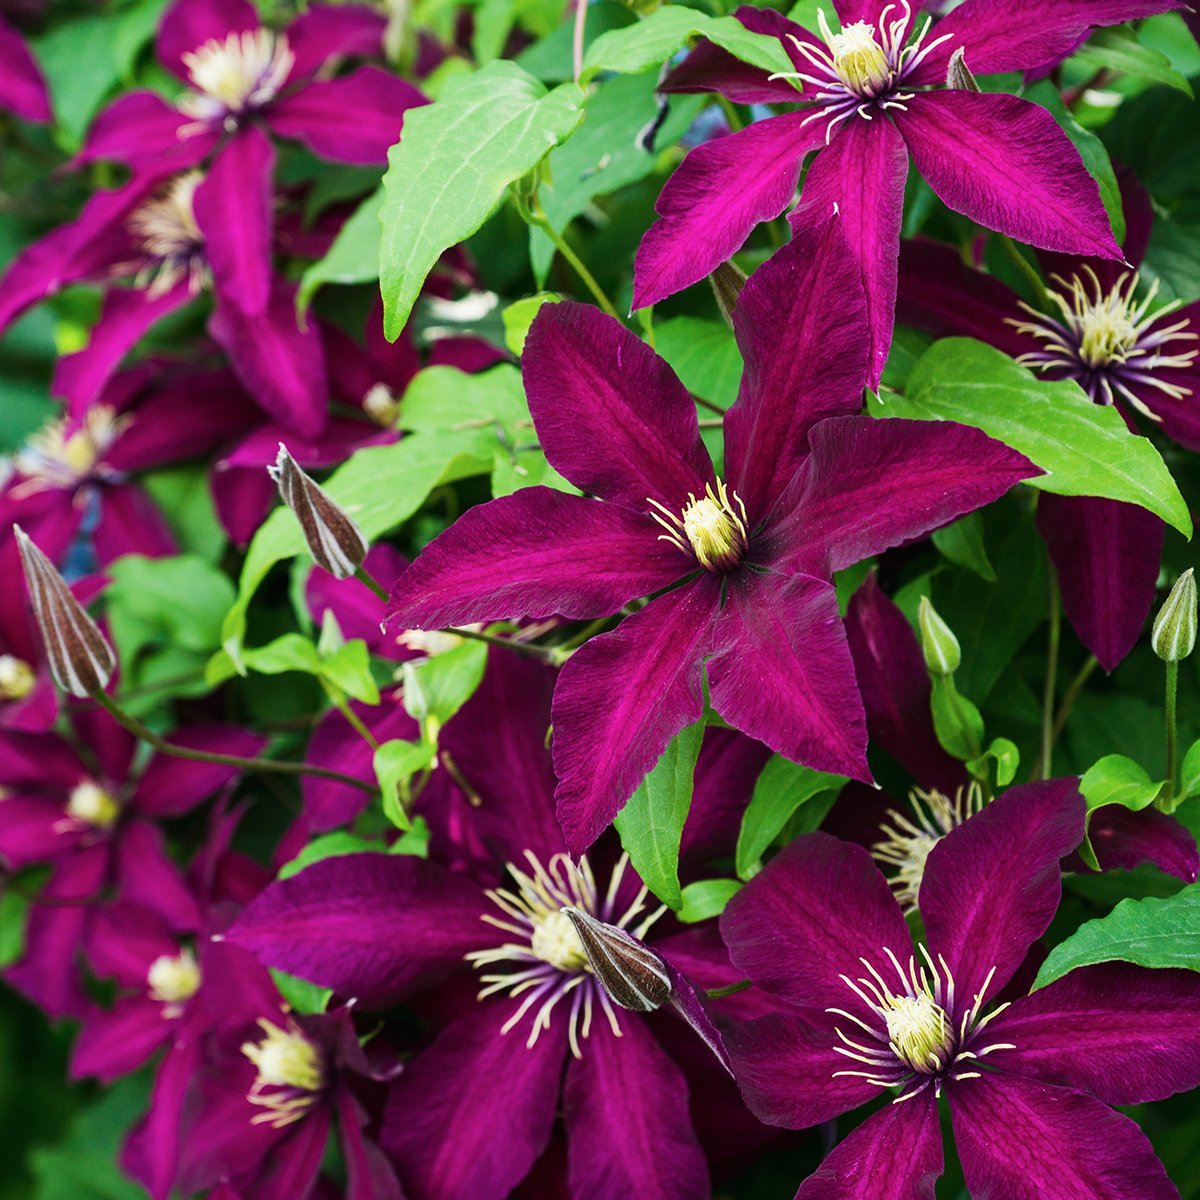
How to Successfully Expand Your Clematis Collection: Clematis, with their vibrant blooms and captivating climbing habits, are a gardener’s delight. Expanding your clematis collection can transform your garden into a vibrant tapestry of color and fragrance. But, successfully growing these beautiful vines requires understanding their unique needs and adopting the right care practices.
This guide delves into the intricacies of clematis cultivation, providing you with the knowledge and techniques to create a thriving collection that will enhance your garden for years to come.
From selecting the right varieties to mastering propagation techniques, this comprehensive guide will equip you with the tools to confidently expand your clematis collection. Whether you’re a seasoned gardener or a novice, this guide will provide valuable insights and practical advice to ensure your clematis flourish in your garden.
Understanding Clematis: A Foundation for Expansion
Before diving into the exciting world of expanding your clematis collection, it’s essential to understand the basics of these captivating vines. This knowledge will guide you in selecting the right varieties for your garden and ensuring their thriving growth.
Clematis Groups and Growth Habits
Clematis are categorized into groups based on their pruning requirements and flowering habits. Understanding these groups is crucial for selecting varieties that will thrive in your specific garden conditions and provide continuous blooms throughout the season.
Expanding your clematis collection can be a rewarding endeavor, and autumn offers a unique opportunity to find new varieties. While you’re exploring the world of clematis, consider taking a trip to a local orchard for a taste of fall festivities.
Harvest Moon Orchard: A Guide to Fall Fun and Festivities is a great resource for planning your fall adventures, and you might even find inspiration for your clematis collection amidst the vibrant autumn colors and seasonal treats.
- Group 1: Early Large-Flowered Clematis: These clematis bloom on old wood, meaning they produce flowers on stems from the previous year. They require minimal pruning, typically a light trim after flowering. Examples include ‘Nelly Moser’ and ‘Jackmanii.’
- Group 2: Late Large-Flowered Clematis: These clematis bloom on new wood, meaning they produce flowers on stems grown in the current year. They can be pruned back to the ground in late winter or early spring. Examples include ‘Ville de Lyon’ and ‘Niobe.’
- Group 3: Small-Flowered Clematis: These clematis bloom on both old and new wood and can be pruned back to the ground in late winter or early spring. They are known for their abundant blooms and are excellent choices for covering walls, fences, and trellises.
Examples include ‘Sweet Autumn’ and ‘Blue Angel.’
- Group 4: Viticella Clematis: These clematis are vigorous growers with abundant blooms on new wood. They can be pruned back to the ground in late winter or early spring. Examples include ‘Etoile Violette’ and ‘Polish Spirit.’
- Group 5: Atragene Clematis: These clematis are among the earliest to bloom, producing delicate flowers on old wood. They require minimal pruning, typically a light trim after flowering. Examples include ‘Pamela Jackman’ and ‘Macropetala.’
Ideal Growing Conditions for Clematis
Clematis thrive in well-drained soil with a slightly acidic to neutral pH (6.0 to 7.0). They prefer a location with full sun to partial shade, especially in warmer climates. It’s crucial to ensure the soil remains consistently moist but not waterlogged.
- Sunlight: While clematis prefer full sun, they can tolerate partial shade, especially in hotter climates. In regions with intense afternoon sun, consider planting them in a location with morning sun and afternoon shade.
- Soil: Clematis prefer well-drained soil that is rich in organic matter. Amend the soil with compost or other organic materials to improve drainage and fertility.
- Moisture: Clematis need consistent moisture but do not tolerate waterlogged conditions. Water deeply and infrequently, allowing the top inch of soil to dry out between waterings.
Selecting Clematis Varieties for Your Climate and Garden Space
When choosing clematis varieties, consider your climate, garden space, and desired bloom time.
- Climate: Select varieties that are hardy in your climate zone. Check the plant tags or online resources for information on hardiness zones.
- Garden Space: Consider the size and growth habit of the clematis variety. Choose varieties that will fit comfortably in your designated space without becoming overcrowded.
- Bloom Time: Select varieties that will provide blooms throughout the growing season. Consider planting a combination of early, mid, and late-blooming varieties for continuous color.
Acquisition: How To Successfully Expand Your Clematis Collection
Expanding your clematis collection involves acquiring new plants. There are several avenues for obtaining clematis, each with its own advantages and disadvantages. This section explores the various options for acquiring clematis, emphasizing the importance of selecting healthy and disease-free plants.
Sources for Clematis Acquisition
There are various sources for obtaining clematis, each with its own pros and cons. Here’s a comparison of the most common options:
Source |
Pros |
Cons |
|---|---|---|
Nurseries |
Wide variety of clematis species and cultivars; expert advice; potential for discounts or sales |
Higher prices compared to online retailers; limited selection depending on location; may not have specific cultivars |
Garden Centers |
Convenience and accessibility; potential for seasonal discounts; visual inspection of plants |
Limited variety; may not have specialized clematis knowledge; potential for unhealthy plants due to improper care |
Online Retailers |
Vast selection; competitive pricing; convenient delivery options |
Risk of receiving damaged plants; difficulty in assessing plant health; potential for shipping delays |
Selecting Healthy Clematis
It’s crucial to select healthy and disease-free clematis plants to ensure successful growth and flowering. Look for plants with:
- Strong, vigorous stems with healthy foliage.
- No signs of pests or diseases, such as aphids, spider mites, or fungal infections.
- Well-developed root systems with no visible damage or rot.
- A good balance between top growth and root development.
Clematis Propagation Methods
Clematis can be propagated through various methods, each with its own advantages and disadvantages. Here’s a comparison of common propagation methods:
Method |
Pros |
Cons |
|---|---|---|
Seed Propagation |
Cost-effective; can produce a large number of plants; suitable for specific cultivars |
Time-consuming; requires specialized knowledge and techniques; unpredictable results |
Cuttings |
Relatively easy; produces true-to-type plants; faster than seed propagation |
Limited number of plants per cutting; requires specific timing and techniques; not suitable for all cultivars |
Layering |
Simple and effective; produces strong, healthy plants; suitable for most cultivars |
Slower than cuttings; requires space and time; not suitable for all cultivars |
Division |
Produces new plants quickly; preserves the characteristics of the parent plant; suitable for established plants |
Can damage the parent plant; requires careful handling; not suitable for all cultivars |
Planting and Establishment
Planting clematis is a rewarding experience that sets the stage for a vibrant display of flowers in your garden. The success of your clematis depends on choosing the right location and providing suitable growing conditions. This section Artikels the key steps to ensure your clematis thrive and flourish in your garden.
Planting Clematis
Planting clematis is a straightforward process, but a few key steps ensure success. Here’s a detailed guide:
- Choose the right time: The ideal time to plant clematis is in spring or fall. Spring planting allows the clematis to establish itself before the summer heat, while fall planting allows the roots to develop before winter dormancy.
- Prepare the planting hole: Dig a hole twice as wide and as deep as the root ball. This allows the roots to spread out and establish themselves easily.
- Amend the soil: Clematis prefers well-drained soil rich in organic matter. Mix compost or manure into the planting hole to improve soil structure and drainage.
- Position the clematis: Place the clematis in the hole so the top of the root ball is level with the ground. Ensure the crown of the plant (the point where the roots meet the stems) is not buried.
- Backfill the hole: Fill the hole with the amended soil, gently firming it around the roots. Avoid compacting the soil, as this can restrict root growth.
- Water thoroughly: After planting, water the clematis deeply to settle the soil and encourage root establishment.
- Provide support: Clematis needs support to climb and grow. Install a trellis, fence, or other support structure near the plant.
- Mulch: Apply a layer of mulch around the base of the plant to conserve moisture and suppress weeds.
Selecting the Optimal Planting Location, How to Successfully Expand Your Clematis Collection
The success of your clematis hinges on selecting the right location. Consider these factors:
- Sunlight: Most clematis varieties thrive in a location with at least six hours of sunlight daily. However, some varieties, such as those with dark-colored flowers, prefer partial shade, especially in hot climates.
- Soil drainage: Clematis cannot tolerate wet feet. Ensure the planting site has good drainage to prevent root rot.
- Protection from wind: Clematis can be damaged by strong winds, especially when in bloom. Choose a location sheltered from harsh winds.
- Support structure: The location should provide ample space for the chosen support structure to accommodate the clematis’ growth habit.
Companion Plants for Clematis
Companion planting can enhance the beauty and health of your clematis. These plants provide shade, attract beneficial insects, or offer complementary colors:
Companion Plant |
Benefits |
|---|---|
Roses |
Provides shade for the base of the clematis and creates a beautiful contrast in colors and textures. |
Lavender |
Attracts beneficial insects and repels pests. |
Salvia |
Offers a vibrant display of color and attracts pollinators. |
Hosta |
Provides shade for the base of the clematis and adds a lush, textured element. |
Nepeta |
Attracts pollinators and repels pests. |
Maintenance and Care
Providing the right care for your clematis is crucial for their health and longevity. This includes understanding their watering needs, providing appropriate nutrition, and implementing effective pruning techniques. Additionally, being aware of common pests and diseases and knowing how to protect your plants from harsh weather conditions will help ensure their continued flourishing.
Watering Clematis
Clematis require consistent moisture, especially during their active growing season. However, overwatering can lead to root rot, so striking a balance is essential.
- Water deeply and infrequently, allowing the soil to dry slightly between waterings.
- Mulch around the base of the plant to help retain moisture and suppress weeds.
- Avoid watering the foliage, as this can increase the risk of fungal diseases.
Fertilizing Clematis
Clematis benefit from regular fertilization, especially during their blooming period.
- Apply a balanced fertilizer, such as a 10-10-10 formula, in early spring and again in mid-summer.
- Avoid using fertilizers high in nitrogen, as this can promote leaf growth at the expense of flowering.
- You can also use organic fertilizers, such as compost or manure, to provide essential nutrients.
Pruning Clematis
Pruning is essential for maintaining the shape and health of your clematis.
- The type of pruning required depends on the clematis group, as each group has different flowering habits.
- Group 1 clematis, which bloom on old wood, should be pruned lightly after flowering.
- Group 2 clematis, which bloom on both old and new wood, can be pruned after flowering or in early spring.
- Group 3 clematis, which bloom on new wood, should be pruned hard in late winter or early spring.
Pests and Diseases
Clematis are susceptible to a variety of pests and diseases.
- Common pestsinclude aphids, spider mites, and Japanese beetles. These can be controlled with insecticidal soap or neem oil.
- Common diseasesinclude clematis wilt, powdery mildew, and leaf spot. These can be treated with fungicides or by removing infected plant material.
Protecting Clematis from Harsh Weather
Clematis can be sensitive to extreme weather conditions.
- In cold climates,protect clematis from frost damage by mulching around the base of the plant and covering them with burlap or frost blankets.
- In hot climates,provide shade during the hottest part of the day to prevent scorching.
- During windy conditions,secure the clematis to a sturdy support to prevent damage.
Propagation

Propagation is a rewarding aspect of clematis gardening, allowing you to expand your collection and share the beauty of these vines with others. Two common methods, division and cuttings, provide successful pathways for creating new plants.
Division
Division is a straightforward method for propagating clematis, especially suitable for clump-forming varieties. This technique involves separating a mature plant into multiple divisions, each with its own root system and growing points.
- Timing:The best time for division is during the dormant season, typically in late autumn or early spring, before new growth emerges.
- Preparation:Choose a healthy, well-established clematis plant. Carefully dig around the base of the plant, exposing the root ball.
- Division:Using a sharp knife or spade, divide the root ball into sections, ensuring each division has healthy roots and stems.
- Planting:Plant the divisions in well-prepared soil, ensuring the root ball is covered with a layer of soil. Water thoroughly after planting.
Taking and Rooting Clematis Cuttings
Taking and rooting clematis cuttings is another effective propagation method. This technique involves taking sections of stems with nodes (points where leaves or buds emerge) and encouraging them to develop roots.
- Timing:The ideal time for taking cuttings is during the spring or early summer, when the plant is actively growing.
- Selecting Cuttings:Choose healthy, non-flowering stems from the current year’s growth. Cuttings should be 4-6 inches long, with two to three nodes.
- Preparing Cuttings:Make a clean cut just below a node, using a sharp knife or pruning shears. Remove any leaves from the bottom node, and trim the leaves on the remaining nodes in half.
- Rooting:There are two primary methods for rooting cuttings:
- Soil Rooting:Dip the cut end of the cutting in a rooting hormone powder and insert it into a pot filled with a well-draining potting mix. Keep the soil moist and place the pot in a bright, indirect light location.
Expanding your clematis collection can be a rewarding experience, and propagation methods are a great way to increase your plant inventory. Just as you might learn about propagating clematis, understanding how to propagate carnivorous plants like Venus flytraps can be equally fascinating.
For beginners, Venus Fly Trap Propagation for Beginners: An Easy Guide offers a comprehensive guide to successfully multiplying your collection. While clematis and Venus flytraps have different growing needs, the principles of propagation are similar, providing valuable insights into plant growth and development.
- Water Rooting:Place the cutting in a jar or vase filled with water. Change the water every few days to prevent bacteria growth. Once roots appear, transfer the cutting to a pot with potting mix.
- Soil Rooting:Dip the cut end of the cutting in a rooting hormone powder and insert it into a pot filled with a well-draining potting mix. Keep the soil moist and place the pot in a bright, indirect light location.
- Maintenance:Keep the cuttings in a warm, humid environment and monitor them regularly for signs of root development.
Success Rates of Propagation Methods
The success rates of propagation methods vary depending on factors such as the clematis variety, the time of year, and the specific techniques employed.
Division generally has a high success rate, particularly when performed during the dormant season.
Cuttings can be more challenging, but with proper techniques and care, they can also yield successful results.
Creative Design
The beauty of clematis lies not only in its captivating blooms but also in its versatility as a garden element. Clematis can be strategically incorporated to enhance the aesthetic appeal of various garden structures, creating a harmonious blend of color, texture, and form.
Clematis for Garden Structures
Choosing the right clematis variety for a specific garden structure is crucial to achieving a visually pleasing and flourishing display. Consider the following factors:
- Growth Habit:Different clematis varieties exhibit distinct growth habits. Some are vigorous climbers, while others are more compact.
- Flower Size and Color:The size and color of clematis flowers can significantly impact the overall visual impact.
- Blooming Period:Selecting clematis varieties with staggered blooming periods ensures a continuous display of color throughout the growing season.
Garden Structure |
Recommended Clematis Varieties |
|---|---|
Trellis |
Clematis montana ‘Rubens’, Clematis ‘Jackmanii’, Clematis ‘Nelly Moser’ |
Arbor |
Clematis ‘Ville de Lyon’, Clematis ‘The President’, Clematis ‘H.F. Young’ |
Wall |
Clematis ‘Ernest Markham’, Clematis ‘Niobe’, Clematis ‘Mrs. Cholmondeley’ |
Clematis in Container Gardening
Clematis can thrive in containers, adding a touch of vertical interest to patios, balconies, and decks.
- Container Size:Choose a container that is at least 12 inches in diameter and depth to accommodate the clematis’ root system.
- Drainage:Ensure the container has adequate drainage holes to prevent waterlogging.
- Potting Mix:Use a well-draining potting mix specifically designed for container gardening.
- Support:Provide a sturdy support structure within the container for the clematis to climb, such as a trellis or obelisk.
Examples of suitable containers include:
- Terracotta pots:These pots are classic and provide excellent drainage.
- Wooden planters:Wooden planters offer a natural aesthetic and can be painted to match your garden’s style.
- Metal containers:Metal containers are durable and come in a variety of shapes and sizes.
“Container-grown clematis are ideal for smaller gardens or those with limited space.”
Outcome Summary
Expanding your clematis collection is a rewarding journey that will bring joy and beauty to your garden. By understanding the basics of clematis care, choosing the right varieties, and employing effective propagation methods, you can cultivate a thriving collection that will amaze you with its vibrant blooms and captivating presence.
As you explore the world of clematis, remember to embrace the process, experiment with different varieties, and enjoy the beauty and diversity that these magnificent vines bring to your garden.
FAQ Explained
What are the best clematis varieties for beginners?
Clematis ‘Jackmanii’ and Clematis ‘Nelly Moser’ are known for their hardiness and ease of care, making them excellent choices for beginners.
How often should I fertilize my clematis?
Clematis benefit from regular fertilization during the growing season. Apply a balanced fertilizer every 4-6 weeks, ensuring you avoid direct contact with the roots.
Can I grow clematis in containers?
Yes, clematis can be successfully grown in containers. Choose a large pot with good drainage and provide ample support for the vines to climb.
